Industrial robots are indispensable in the automation and labor-saving of a plant. In order to accurately control their movements, it has become necessary to detect angles with high precision. How can the detecting of angles with high precision be evaluated? We will report on the devices born out of Tamagawa’s unrelenting commitment to angle accuracy.
Why Is the Accuracy of Angles Necessary?
The rotary encoder that is used for the angle sensors of servo motors and so on is a sensor that is indispensable for the control of industrial robots and semi-conductor manufacturing equipment. The demand for miniaturization and densification of products requires manufacturing equipment to be capable of precision movements. The resolution of rotary encoders was 11 bits in the late 1990s (1 bit is about 0.18° = resolution that divides 360° into 0.18° segments), and although this was the mainstream, in the early 2000s, resolution saw dramatic improvements to 17 bits (1 bit is approximately 0.003° = resolution that divides 360° into 0.003° segments).While resolution continues to improve, the need for calibration work to see whether the angles of angle sensors are correct and to evaluate the accuracy has also increased.
What Is the Calibration of Angles?
The calibration of angles refers to comparing the accuracy of an angle sensor with a reference to make an evaluation. However, as comparing with a standard stipulated by law each time is difficult, a device is used to carry out calibration work to evaluate measuring capability with a rotary encoder acknowledged as a secondary standard for national standard instruments.

Ensuring the connection between the user’s angle sensor and the national standard in this way is called traceability, and is required by ISO9001 and IATF16949.International standards for length and weight (standard instruments) have been established for a long time, but there are no international standards for angle criteria. In Japan, standard instruments were stipulated in 2003, and a traceability system was put in place.
Angle calibration business of Tamagawa Seiki Co., Ltd.
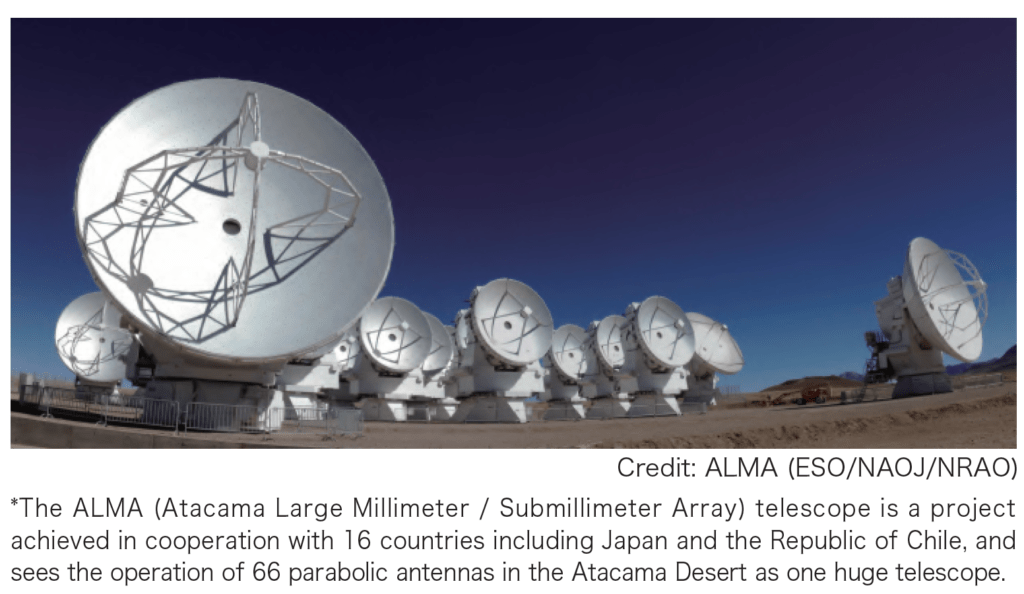
While developing a general-purpose rotary encoder, Tamagawa also worked on the development of a special sensor such as the angle sensor for antenna rotation of the National Astronomical Observatory of Japan. In 1999, their product was used for the angle sensor of the ALMA* telescope.
However, at the time, as the required angle accuracy could not be measured in-house, consideration was given to whether there was a way of being able to do it in-house. This became the impetus for Tamagawa’s angle calibration business initiative. Then, in 2008, their angle calibration business, which started out as a private enterprise, was registered as a business with the Japan Calibration Service System (JCSS), and thus their calibration business for angle sensors was born.

High Precision Angle Calibrator:

What Do You Mean the Top Measuring Capability Is “0.062 Seconds?”
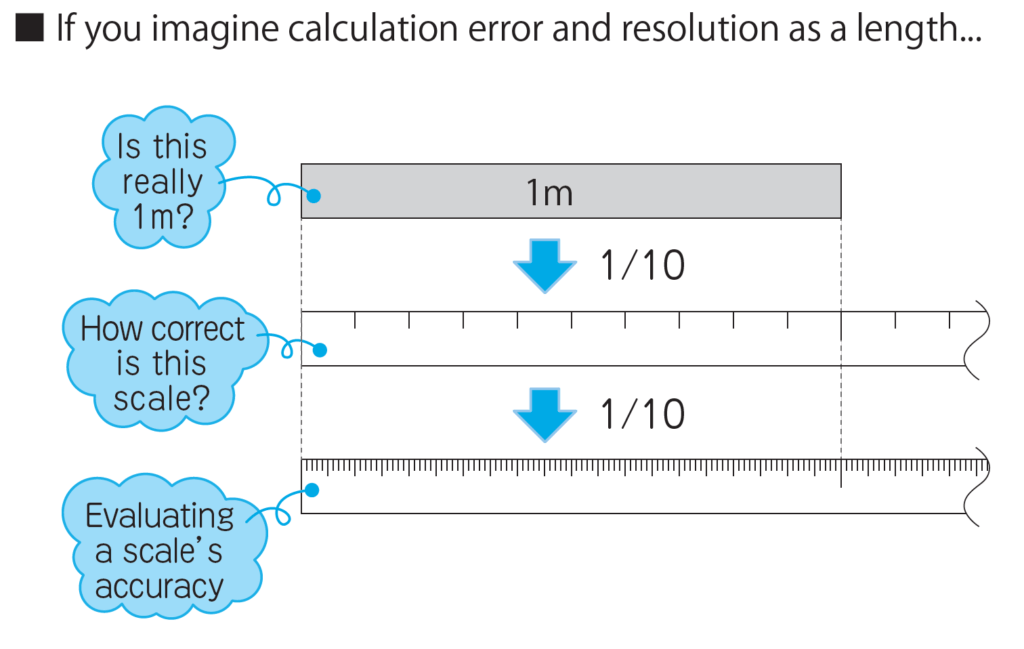
This angle calibrator, for receiving certification by Tamagawa as a calibration business, began development with the goal of “being a device that can measure the calibration accuracy of angle sensors in 0.1 seconds.”In order to measure accuracy in 0.1 second, the calculation error of 1/10 (0.01 second) must be known, and the resolution required to understand the error is a precision of 0.001 second, which is 1/10 of the calculation error.However, the top measuring capability of their completed angle calibra- tor is 0.062 seconds, which is dramatically better than Tamagawa target value. This means that the device has an accuracy of 1/100 their original goal.

How Is Precision Measured?
If it is a rotary angle sensor, angle calibration can be done with a rotary encoder, resolver, or synchro
The precision of an angle is evaluated by using the following two methods. In consideration of the mounting calculation error, the device checks reproducibility (whether the same calculation error is produced) by changing the position of the installation multiple times.
- Phase difference time conversion method.
The number of measurement clock pulses between the output pulse signals of the reference sensor that rotates at a constant speed and the calibrated angle sensor is calculated, and then this time is converted into an angle to measure the variation in the angle accuracy.
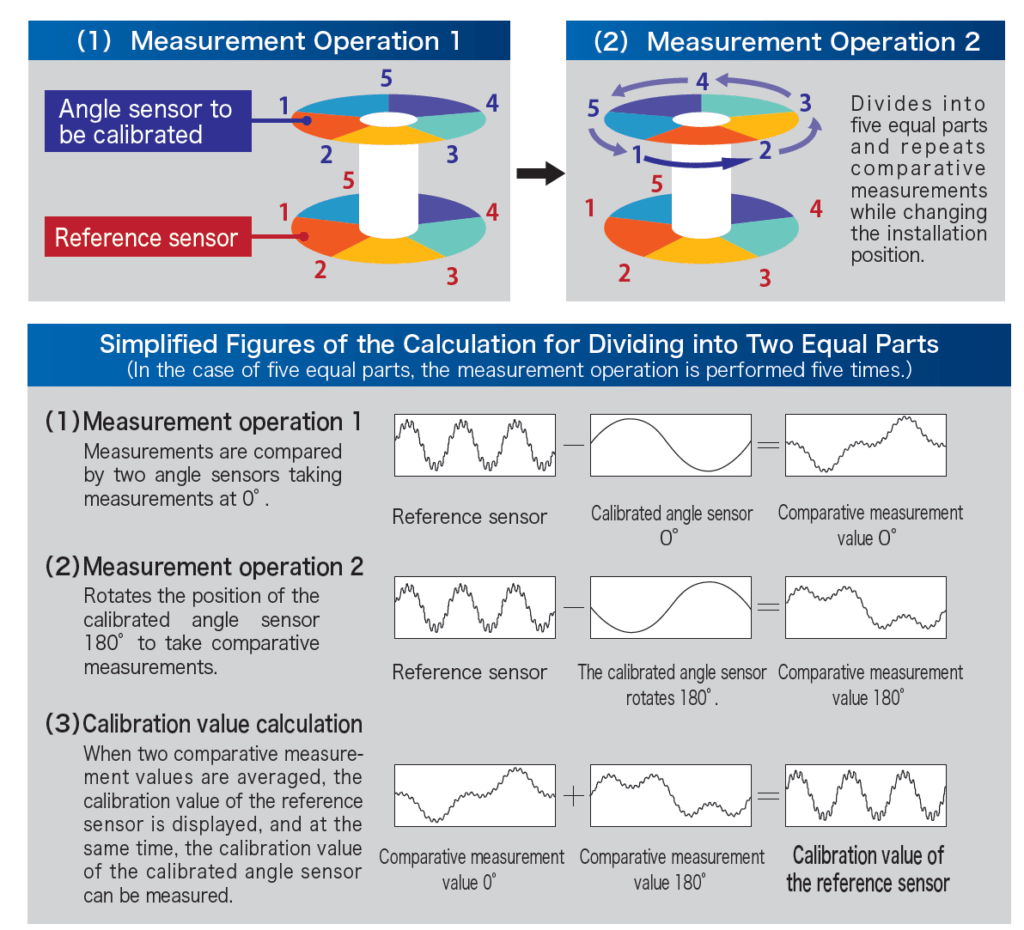
- Method for dividing equally
The reference sensor and the angle sensor to be calibrated are divided into 5 equal parts, comparative measurements are repeatedly taken while changing the mounting position, and then the 5 comparative data items are added and averaged to obtain the deviation of the calibrated angle sensor. This method enables the deviation of the reference sensor and the calibrated angle sensor to be completely separated, and the deviation of the calibrated angle sensor can be extracted.

Contents from “Tamagawa News” magazine n. 23.